I wanted to publish online, and also to print, some of my favourite travel photos from the past two years. After going through my collection, I had slightly over a hundred favourites. These were of different sizes and orientations. I also wanted to add text captions to them.
Printing 100+ odd-sized photos individually would be quite expensive, wasting a lot of paper, so I opted to pack the annotated photos onto A0 posters (841x1189mm area) then print just a few A0 posters, which could be cut down as needed to separate the individual photos.
Doing this all manually would have been a boring and time-consuming procedure, so I automated it.
Automated “favourites” collection, linked to on-line photo stream
First, I created a “FAVOURITES” file and a “Print” folder:
  ~/photos/
    FAVOURITES        <---- Favourites list
    000 Collection/   <---- Symbolic links to favourite photos
    ...
    081 Iceland day 1/
    082 Iceland day 2/
    ...
    198 Party in Helsinki/
Then I added the filename of each “favourite” photo to the FAVOURITES file, one per line. Since the photos all have paths of the form “999 Album name/_DSC1234.nef”, I simply put the album nunber and photo number for each “favourite” photo in the file rather than listing full paths. A one-liner of Bash expanded these to full paths afterwards.
I then ran my new “update-favourites” script. This does five steps:
- Create symbolic links in ‘000 Collection’ folder, to each photo listed in ‘FAVOURITES’.
- Render each photo to some easily-handled format (JPEG or PNG). Store in ‘000 Collection/fullsize’.
- Scale each photo down and compress for web, adding a watermark (via my existing watermark script). Store in ‘000 Collection/web’.
- Create a web page (HTML file) for viewing the photos, grouping them by album.
- Upload the scaled-down, watermarked photos to my web server. Also upload the HTML file.
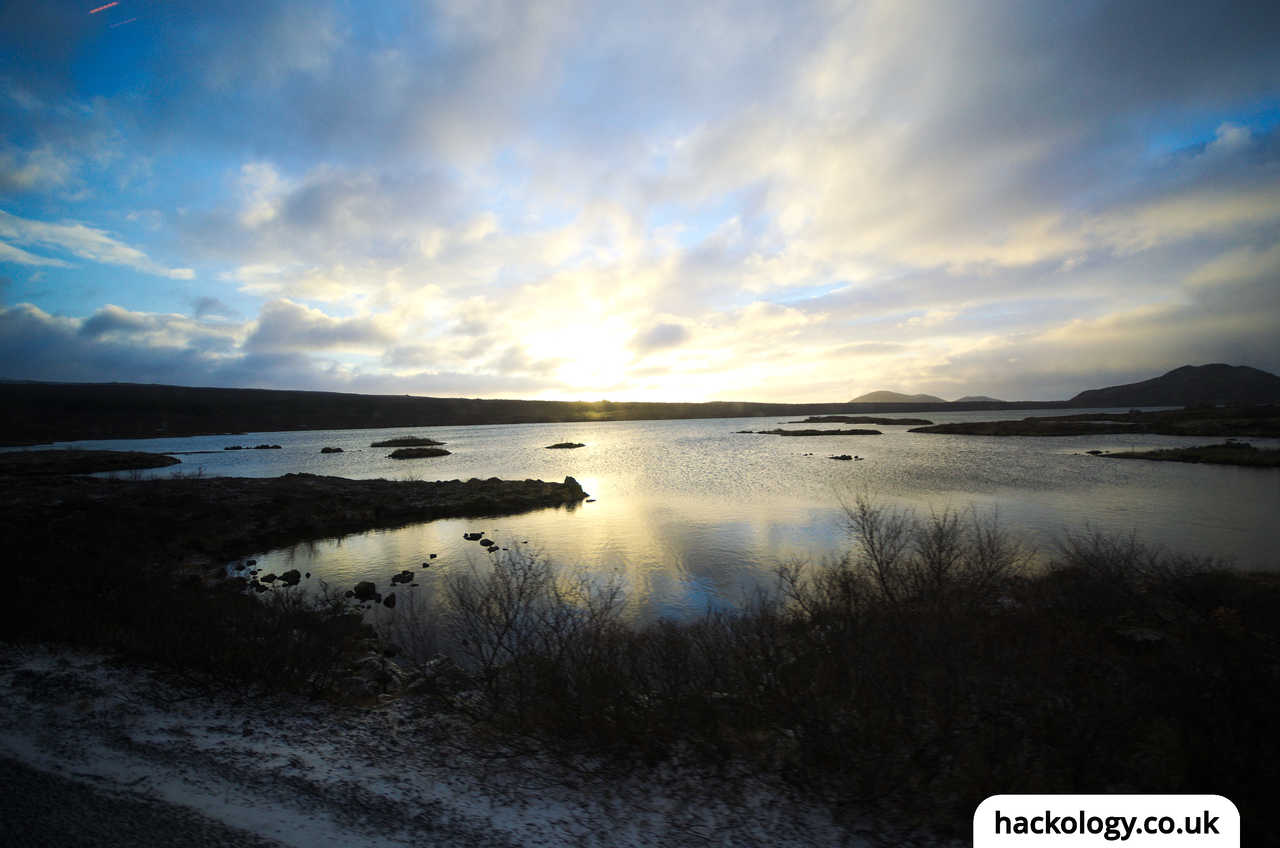
A downscaled, watermarked image:
Now I can just add/remove paths to photos to the FAVOURITES file, then run “update-favourites”, and after a few minutes my photo stream will be updated with the new photos (downscaled, watermarked and compressed).
Downscaling, watermarking, and uploading new photos to my stream is basically a one-liner in the terminal now.
Another bonus of this is that the entire ‘000 Collection’ subtree can be reproduced from the source photos and the FAVOURITES file. So the size of my photos backups has only increased by the size of the FAVOURITES text file – I don’t have gigabytes of duplicated photos.
Optimising for print
I created another folder for managing printables:
  ~/photos/
    FAVOURITES
    000 Collection/
    000 Print/         <---- Print folder
      large/           <---- I want some photos to be larger than others
      small/
      annotated-resized/
    ...
    081 Iceland day 1/
    082 Iceland day 2/
    ...
    198 Party in Helsinki/
From the ‘fullsize’ (not watermarked) renderings from the previous script, I can copy photos into the ‘large’ and ‘small’ folders in the ‘Print’ folder.
I then have four separate scripts to automate different steps of the print layout process (and also a shared configuration which is sourced by each of those scripts). The scripts are as follows:
- Index generator – this creates a human-readable TSV-format table listing:
- The filename of each photo
- The desired output size (small/large)
- The image dimensions (in pixels)
- EXIF data (shutter speed, aperture, focal length, timestamp)
- Annotator – this scans the EXIF data of the indexed photos for comments, and prompts me to modify/add comments to the photo metadata. The comments specify the photo location and the photo title.
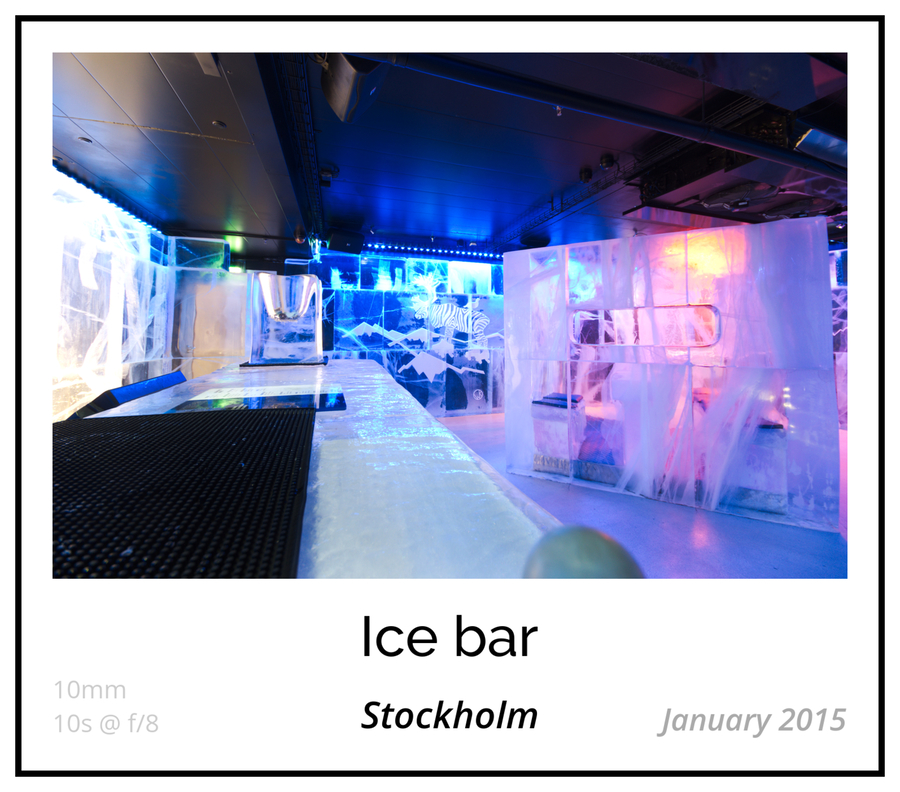
- Renderer – this uses ImageMagick to pad the image, add text below it (photo title, location, EXIF data), add a border to it, and also a margin. The resulting images are stored in the ‘annotated-resized’ directory. These files depend on the configured size limits for “large” and “small” photos, but not on the desired output page size.
- Layout generator – I wrote this in Python, it (very approximately) solves the (NP-hard) 2D box-packing problem. It generates a layout which places images on the page such that:
- Images do not overlap
- Wasted space between images is kept fairly low (so less pages are needed, ergo lower cost)
- The order of the photos is roughly chronological, so photos are easy to find.
It has two different layout strategies: one wastes less space while the other preserves ordering better. Both strategies require only a single pass over the image index so they are quite fast. They are essentially Markov processes, with the layout as the state and the dimensions of the next image as the random input.
After generating a layout, the layout is exported as an SVG file, with coloured boxes representing the images and with each box numbered to indicate which image should be placed in it.
Immediately after exporting the SVG layout, ImageMagick is invoked to render the actual collage which will be then printed.
The index generator just produces a text file, while the annotator just stores text metadata to the images. The renderer generates captioned, boxed image tiles such as:
The layout generator produces a layout like this (click to view in new tab):

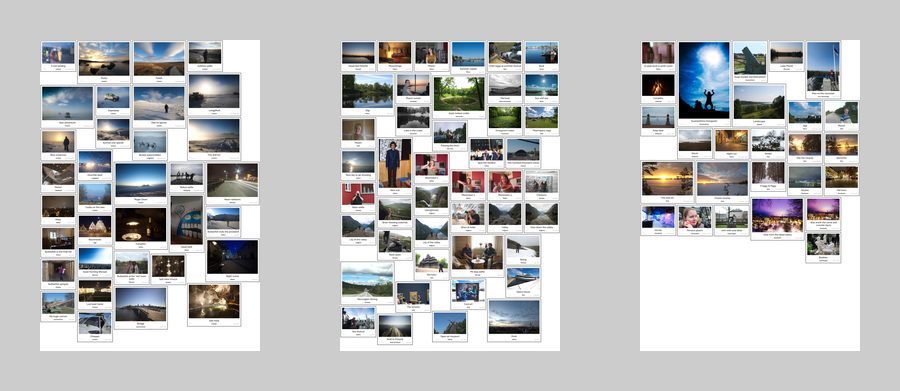
It then renders each page, producing ready-for-print images like these:
Automation paying off
After initially rendering with large (12mm) text, large padding and margins (10mm each), I decided that I didn’t like the amount of white-space in the resulting pages.
After changing a dozen numbers in the configuration file, I re-ran the render script and the layout script. One coffee later, all images had been re-labelled, re-framed, and the layout had been re-calculated and re-generated.
I then decided that printing onto A0 paper would cause a headache when I try to take these poster rolls onto a RyanAir flight to the UK – so I changed one line in the configuration, re-ran the layout script, and was left with a new collage to print on six pieces of A1 paper instead three pieces of A0.
I then wanted there to be less “large” photos, so I moved some of the less impressive ones from the “large” folder to the “small” folder. I then ran scripts 1, 3, 4 again (build index, render annotated/padded tiles, generate and render layout). So three lines of shell later, I had new montages on my screen, which looked ready to print.
Without automation, I would have had to re-size and re-annotate each image manually, then manually lay them out to form the montages.